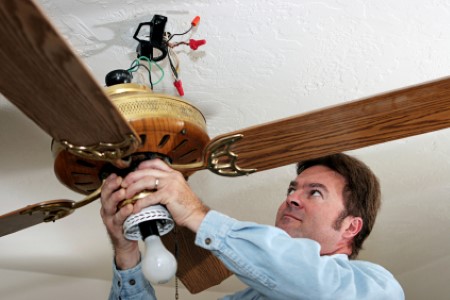
Tips On Ceiling Fan Repair

If you have a ceiling fan that is broken or sticking, our electrical technicians have some helpful maintenance tips for you to use. These tips will help ensure your ceiling fans continue to operate smoothly. Here are the steps needed to repair a stuck or broken fan when it is possible to remove and replace the blade assembly.
Be sure that the fan is unplugged and has stopped spinning before you begin working on it. You will be able to work more easily if you make sure the blades are turned off. Make sure that nothing is touching or rubbing against any of the wiring or blades before beginning to work on it. Once you have made sure everything is clear, and you've gone over every electrical wiring precaution, you can begin working on repairing your ceiling fan.
Ceiling Fan Repair In 4 Steps
Step 1: Replace Blades - The first thing you should do in order to repair your ceiling fan, if possible, is replacing the broken blades with new ones. You need to be sure that all of the broken pieces are out of the blade assembly and away from any of your other moving parts before putting on new ones. Do not use the old blades.
Step 2: Measure Blade - You will need to measure the length of your blade. This will determine how much you need to adjust the blades, and how far out from the wall they need to be placed. If your ceiling fan has one or more lights attached, be sure that the light fixture is set on a level surface before replacing them, as each light should be level with its blade when in place. You should also make sure you are working on a smooth surface and that you have nothing nearby that may cause damage during this process. Replace a light if needed.
Step 3: Position Blades - You now need to remove the blade assembly and replace it with the new one. Make sure that when you are removing the blade you are not putting any debris in your blades, as you should be able to see inside them at this point. When you have removed all filters, screws, and broken pieces of any kind from inside, place your uniform components for installation into the ceiling fan housing as directed on the backside of all packaging. Your blade assembly will arrive already assembled in a fan housing, which means you do not have to worry about losing parts or having something fall out into these parts while they are under pressure.
Step 4: Tighten Blades - You will now need to tighten the blades to make sure they are in place. You should be able to do this using a screwdriver, but you may need to get a more specialized instrument if your screws are too tight or do not fit into the holes on your blade assembly. Make sure you do not over-tighten these screws, as this can cause damage to other parts of the fan that are designed to spin freely. Once you have finished tightening the blades down and putting everything back together, try spinning your fan again.
Call On The Experts For Safe & Fast Ceiling Fan Repair
Ceiling fans are very useful for cooling off your home, but it is important that you keep them maintained correctly in order for them to continue working correctly. If you have any questions about any aspect of this process or if you would like a free estimate on ceiling fan repair services we offer residents in Parma, please feel free to contact us today at 216-398-8442.
